The ability to add Google fonts to your WordPress website is a four step process and especially useful for those wanting to customise their site a little further. Let’s walk you through the steps.
Step 1 – Choose your font from the Google font store (they’re free to use!)
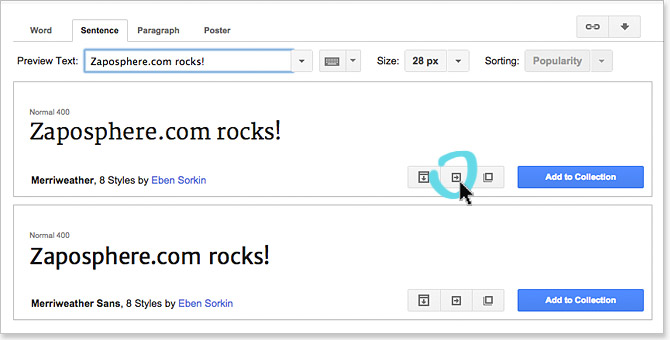
Select a font and hit the Quick Use icon.
Tick any required styles.
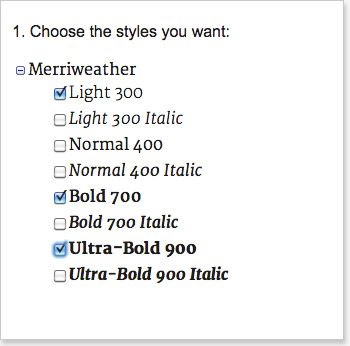
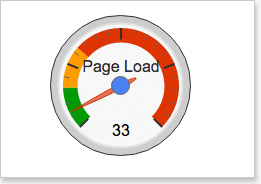
Be aware that the more styles you choose the greater the impact on page loading speed. Some fonts have greater impact than others. Check the impact-o-meter readout and try to keep in the green zone.
Scroll down the page and copy the code in step 3. (Make sure the Standard tab is selected)
You only need to copy the URL portion of the code, but Google won’t let you copy anything less than all of it. So open up your favourite text editor app like Word (PC) or TextEdit (Mac) and paste the code into a blank document. We’ll need this later – but let’s move on.
Step 2 – Back up your theme functions.php file
As we’ve mentioned in several posts before it is easy to ruin your day with a small typo when editing your theme’s function file. So whenever you plan to edit it, copy the file to your computer as a backup. If the next step fails, re-upload your backup file and try again.
Follow step 1 in this tutorial if you’re unsure how to go about this.
Step 3 – Enqueue your chosen Google font stylesheet
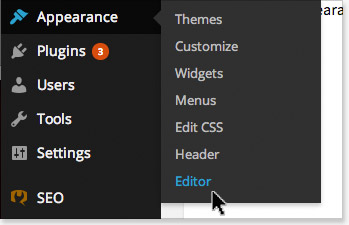
Log into your WordPress site and navigate to your theme editor page via Appearance>Editor
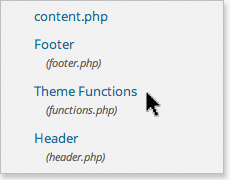
Then select your Theme Functions file.
Then at the very bottom of this file paste this piece of code
/**
 * Enqueue Google Web Fonts
 */
 function load_fonts() {
 wp_register_style('googleFonts', 'insert URL');
 wp_enqueue_style( 'googleFonts');
 }

 add_action('wp_print_styles', 'load_fonts');
Before you hit update, go back to the code you copied from Google and pasted into your text editor. Copy just the URL portion of the code.
For example:

Next, paste/replace this text with that shown in pink above. Your code should look something like this:
/**
 * Enqueue Google Web Fonts
 */
 function load_fonts() {
 wp_register_style('googleFonts', 'http://fonts.googleapis.com/css?family=Merriweather:300,700,900');
 wp_enqueue_style( 'googleFonts');
 }

 add_action('wp_print_styles', 'load_fonts');
Now take a second to just double check it looks ok. Have you still got single quote marks around your pasted URL?
Now your ready to hit Update.
Step 4 – Insert some CSS styles
The last step requires you to tell your site what you want to have that particular font. Some of you may know how add styles to your CSS with relative ease, other may not. The following is some guidelines for those needing help.
There are several ways to proceed and it largely depends on your theme and set up. First find your stylesheet…
Option 1.
Navigate to your theme’s Custom CSS settings page.
Option 2.
Navigate to Appearance>Edit CSS. If you have the Jetpack plugin and its custom CSS module activated.
Option 3.
Navigate to your active theme’s stylesheet via
Appearance>Editor.
Then select Stylesheet style.css from the right-hand file list.
Once you found the place to add styles lets start writing a style.
The style you need to type in will look something like this…
h1 { font-family: 'Merriweather', serif; }
How many styles you need to write, obviously depends on how many elements you want that font style to apply to.
CSS styles broken down
h1 is the selector
font-family is the property
‘Merriweather’ is our chosen font family – replace with your chosen font family
serif is a fall-back font option if our chosen font above doesn’t load properly (sans-serif is an alternative fall-back option)
Most styles will follow these patterns – use them as your guide.
selector { property: style; }
selector, another selector { property: style; property: style; }
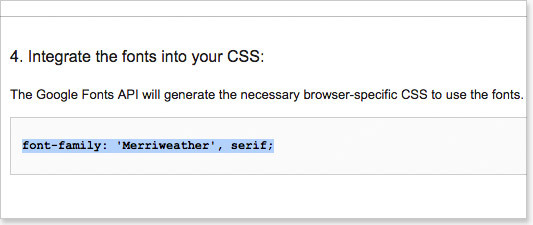
Note: If you take a look back at the Google font store instructions for step 4 they give you the actual style you need to paste in. So all you need to do is choose/find a selector.
Here are some other examples that may just help you out real quick. Don’t forget to replace the font name ‘Merriweather’ with your chosen Google font.
so, to change…
Main site title
.site-title { font-family: 'Merriweather', serif; }
Blog titles
.entry-title { font-family: 'Merriweather', serif; }
General paragraphs
p { font-family: 'Merriweather', serif; }
All headers
h1,h2,h3,h4,h5,h6 { font-family: 'Merriweather', serif; }
Blockquotes
blockquote, blockquote p { font-family: 'Merriweather', serif; }
Widget Titles
.widget .widget-title { font-family: 'Merriweather', serif; }
Choosing the correct CSS selector
To help find the correct CSS selector for your situation take a look at your active theme’s stylesheet and search for similar styles using the font or font-family property. Try replacing an existing font style with your new one. You may just need to replace the existing font name with the new Google font name.
Selecting a font weight (Google call this the font style)
If you’d like to choose a particular font style or weight, you will need to add an additional instruction into your CSS like this:
.entry-title { font-family: 'Merriweather', serif; font-weight:300; }
…the weight needs to correspond with the options you selected at the start of this process.
Negotiating CSS shorthand
Font styles can sometimes be written shorthand like this:
.entry-title { font: normal 13px/150% Arial, Helvetica, sans-serif; }
It follows this structure and order (most elements are optional and may not all be present)
selector { font: font-style font-variant font-weight font-size/line-height font-family; }
Normal is a font weight much like bold, light, 300, 700 etc.
Once you’ve added your styles, hit update and your finished. Well done!
Add Google fonts to your WordPress site – a quick summary
So to summarize the steps required:
- Choose a Google font.
- Back up your theme’s functions file
- Enqueue the Google stylesheet in your active theme’s functions file
- Add some corresponding CSS styles
I hope you found this post useful. Feel free to add your comments below and consider sharing this post with others who’d benefit.
Until next time.
The Zaposphere Team
