
There have been times when I’ve wanted to create a new custom widget area in a WordPress post. This post explains the process without needing to use a plugin. Widget areas can be positioned almost anywhere on the web page or post you just need to carefully follow a few simple steps.
You can easily bloat and slow down your website if you install too many unnecessary plugins. If you’re going to do it – do it right.
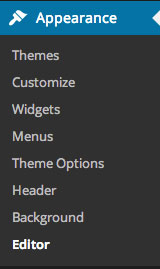
Step 1 – Find and backup your theme functions.php file
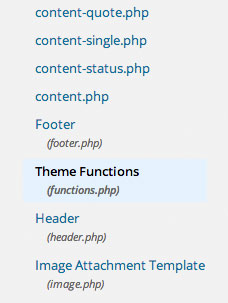
Your functions file lives in your active WordPress theme. To access the file, log into your admin area and navigate to Appearance>Editor and select your functions.php file.
Next, you need to back it up. This is a very important step as a small seemingly insignificant typo can cause your site to stop working! YOU HAVE BEEN WARNED!
The method I use is to access and backup my website files is via FTP using a bit of software called Transmit from the clever bods at Panic! FTP client software can also be found online for free. Try googling ClassicFTP or FileZilla. Once you’ve entered your connection details you can navigate to your theme files and save a temporary safety backup of the functions.php file to your desktop. If all goes wrong you simply re-upload it onto your site and no harm is done. Theme files will live in the folder path:
/wp-content/themes/[your-theme]
Sometimes the first directory in the path may be www or public-html depending on your server setup.
Step 2 – Add a specific set of instructions to your functions file
Scroll to the bottom of the file and insert the following code exactly.
/**
* Custom widget area added [today's date]
*/
register_sidebar( array(
'name' => 'Custom Widget Area',
'id' => 'custom-widget-area',
'before_widget' => '<div id="custom-widget">',
'after_widget' => '</div>',
'before_title' => '<h3>',
'after_title' => '</h3>'
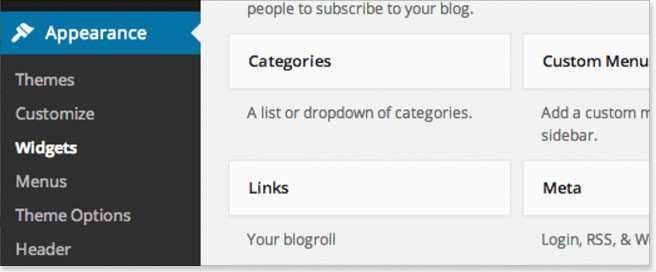
) );This set of instructions simply tells your website to add the necessary tools in the admin area to help you drag ‘n’ drop widgets in place like any other widget area. Replace the text within the square brackets with the date you make a change. This allows you to keep a good track of how and when you customised your theme. You can manage your widget areas at Appearance>Widgets
Step 3 – Placing the widget area where you want it

Next you need to position the widget area in the correct position. Think of this step as positioning it in an ordered queue – ask yourself what you want to see before and after it. You could place it before the post content or after it. You could even place it in a more normal place like the header or footer of the page. To place the widget area after the post content, but before the comments section (which is what I wanted to do with my site) you need to find and edit the correct template file. In my theme I’ve called this content-single.php.
The content of a post usually lives within a bit of code that looks like this…
<div class="entry-content"><?php the_content(); ?></div><!-- .entry-content -->
Following the post content will usually be this…
<footer class="entry-meta">followed by this…
</footer><!-- .entry-meta -->This tells me I’ve found the place I wanted it to live. Inside the meta data area after the post. The section also lives above the comments and so is in prime position to place useful information in front of your readers. By placing your widgets within a standard WordPress page section you’ll have a better chance of the widget area sitting comfortably in position and not looking out of place because of a lack of CSS styling.
The code you need to add is this…
<?php dynamic_sidebar( 'custom-widget-area' ); ?>Make sure you don’t place this piece of code within an existing <?php command. If you don’t understand PHP code it’s always best to place the code directly before a <?php command. Or directly afterwards ?>
Any text sat within code like this: <!– some code –> is a comment used only for reference by people looking at the code itself.
If your theme utilises a range of different post types, ie. gallery posts, aside posts, status posts etc. you may also need to add the line of code into those template files as well.
Step 4 – Add widgets to your widget area
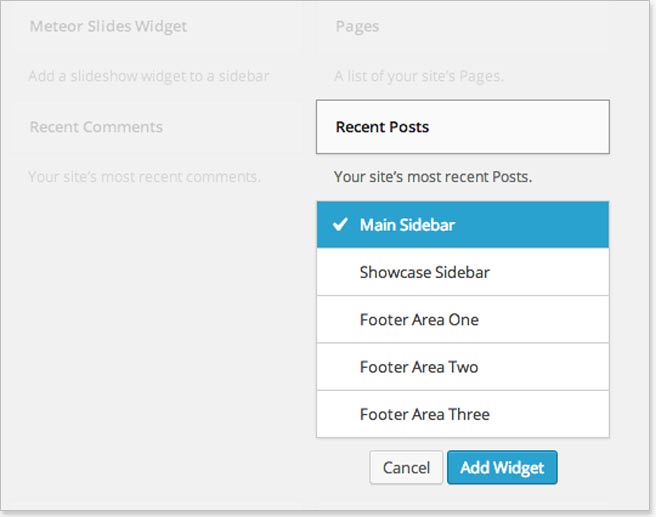
Exactly what it says on the tin. Go to Appearance>Widgets and have fun with your new widget area.
Step 5 (optional) – Add some custom CSS styling
As we’ve carefully added an identifying set of instructions for the new custom widget area, styling it with a bit of CSS should be relatively easy.
The selector for the widget area as a whole is #custom-widget-area { … }
The selector for each widget within the widget area is #custom-widget { … }
The selector for the widget title are this #custom-widget h3 { … }
So, I hope this tutorial proves useful in your quest for knowledge about WordPress web design. If you have any questions or comments about the post, please leave a comment below.
Summary- adding a custom widget area to a WordPress post or page
- Find and backup your theme functions.php file.
- Add a piece of code to your functions file.
- Add a piece of code to a specific template file (depends on where you want it).
- Add widgets.
- Style it.
Until next time…
This has been a great help. Easy and intuitive, thanks for sharing!